Showing posts with label pastels. Show all posts

Friday, March 29, 2013

~~~Dinner With GOOD Friends!!!~~~

 Hello! On Monday we had SNOW all day long. I was having 4 girl friends for dinner that night but I stayed calm and set my table and got dinner cooked. I wanted to share my table here today. We DID have dinner, everyone made it here. The roads actually were fine so it worked out. Since it is Easter week, I set an Easter table. My centerpiece is these faux tulips, placed on my clear glass cake stand and surrounded by some tiny pastel eggs.
 The tulip candlesticks are the perfect pairing. I have sweet candle rings for these candlesticks that I just found TODAY:( I am STILL finding things:):)

 At each placesetting I had a small box with a bunny on top that can be filled with CANDY....or whatever you want! The place setting is on my cutwork tablecloth. I placed my basketweave chargers on the table first, then a cabbage leaf placemat, my polka dot dinner plate, my green and white patterned salad plate and a clear glass bowl.
 I used my green handled flatware.


 Here is a shot of the whole table. There were 5 of us so we sat across from each other to make it cozier. I also switched out the middle place setting to the other side to make more room since that side is open to the foyer.

 These chargers always remind me of an Easter basket so I use them every year. I just got the cabbage placemats, I had been SEARCHING for them and found them online.
 Here is the corner of the tablecloth. The dots on the dishes perfectly match the colors in the tablecloth.

 And the detail of the top.
 I also had a bunny placecard holder at each place. And a tiny tealight holder.
 Yvonne gave me the idea of putting the dessert dishes onto the table if room allows. So I placed the egg shaped, polka dot plates on another cake plate, then  some extra napkins and the dessert forks.

 I only have a setting for 4 of the green flatware so mixed my ivory handled flatware too.


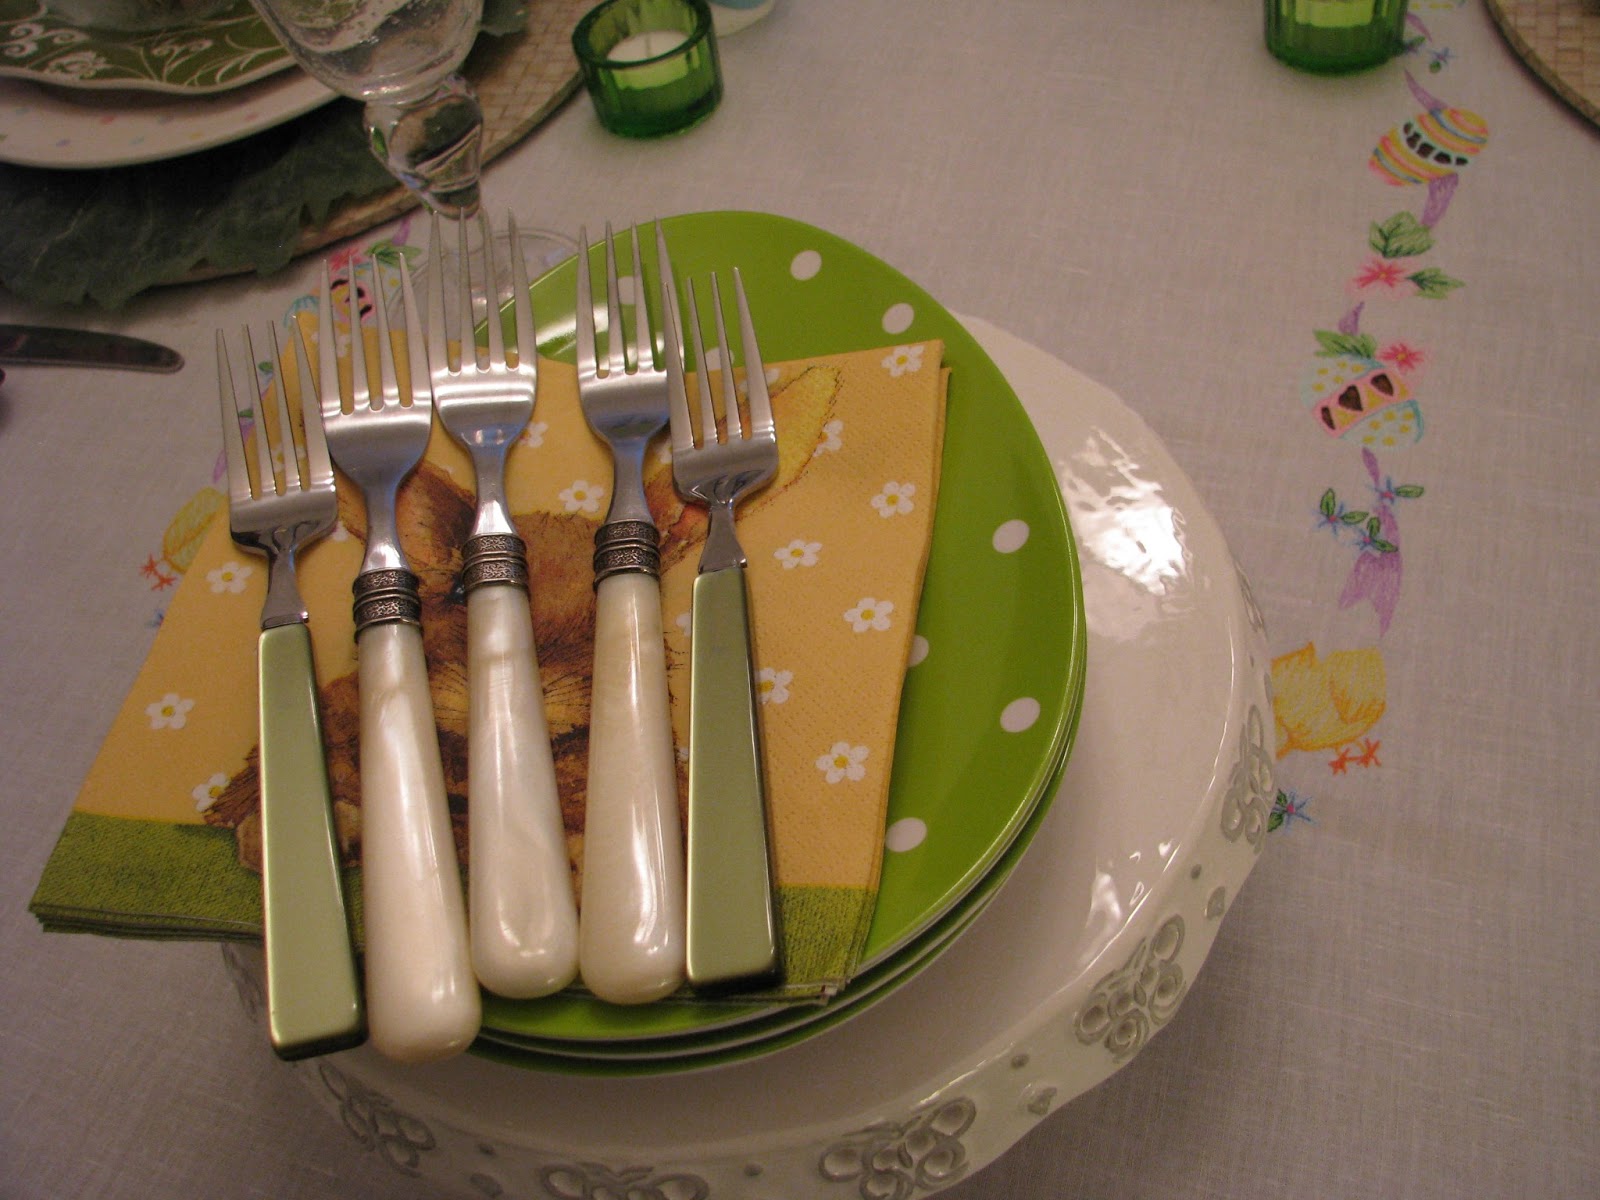
 These are the napkins I got at Yvonne's shower for her almost daughter-in-law (who she calls her daughter in love)!!!!

We all had a really nice evening. Our menu was:
Pasta with artichokes and spinach to which I also added chicken  (I will share the recipe soon)
A broccoli casserole
A garden salad
Bakery bread
And for dessert, wonderful cupcakes!!!!
The hostess provides the main dishe and each girl brings something. It makes it much easier for the hostess!!! We try to get together once a month at someone's house.
Thanks so much for your visit. XO, Pinky
Linking to:

Thursday, March 14, 2013

~~~A New Spring Wreath and Tutorial!!!~~~

 HI! I decided I wanted to make a new Spring/Easter wreath, so I gathered my supplies and thought I would do a tutorial too. Please excuse the things in the background, my work table is here in the storage area of our basement.:) In the picture above, you can see that I started with a plain grapevine wreath.  Then, to that I added another twiggy, moss covered wreath. I just wired them together. Putting 2 wreaths together gives you a nice, lush look. Then I took a bush of forsythia and cut it into 3 large pices and placed them around the wreath. I wanted to make the finished wreath much larger than the size of the 2 wreaths. NOTE: Since I did this I cut the forsythia into more pieces and placed them ALL around the wreath to make a more circular design.
 Here you can see the "twigginess" of the top wreath.
 I then took a bush of spring flowers and cut that all apart too. This is a good designer's trick, use bushes whenever possible. You get MUCH more bang for your buck!
 Here are the pices after I cut them off the main stem. You can see my glue pot in the background. That is another designer trick. NO GLUE GUN. The pot os so mch faster and easier.
 I then made my bow.
and attached it to the wreath on the left side. I am usually right to left oriented. I have observed that some peole are right to left and others are left to right;)
 I then added the largest flowers from the bush and then filled in with the others.
 You just dip your flower stem into the glue and attach to the wreath. Or, see the stick that is wrapped with a pipe cleaner? You can dip that into the glue and add glue to a pick.
 I cut this bush apart for a filler flower.
 These egg picks I found at CTS for just $1.00!!!
 I forgot to get a picture of the other egg pics from Michaels. They had 5 smaller eggs per pick and I used 7 of them. You can see them in this shot. It ALWAYS takes more material than you think it will!!! I also cut apart a yellow filler bush and added it to the wreath.
Here it is on my front door. It is a very nice pick me up with all this cold, dreary, windy weather we are having!!!! NOTE: since I did this post we have had 2 BEAUTIFUL days!!!


 Here it is on my front door. It is a very nice pick me up with all this cold, dreary, windy weather we are having!!!!


 I love how everything really pops against my black door.


Hope you like my new wreath and have gotten some tips.  Thanks so much for your visit. I am linking to:
Motivated Monday at Be Colorful

Making the World Cuter Monday at Making the World Cuter

More the Merrier Monday at DIY Home Sweet Home Project

Savvy Homemade Monday at Home Savvy A to Z

Tabletop Tuesday at A Stroll Thru Life

Tutorials and Tips Tuesday at Home Stories A to Z


It's A Party on Thursday at A Creative Princess
Between Naps on the Porch for Metamorphosis Monday

Show and Share on Thursday at Southern Lovely

Open House Party Thursday at No Minimalist Here

Share Your Creations on Thursday at Kristen's Creations

Remodelaholic's Anonymous on Friday at Remodelaholic

Addicts (not so) Anonymous on Friday at Addicted 2 Decorating

Inspiration Friday at At the Picket Fence

Feathered Nest Friday at French Country Cottage

Potpourri Friday at 2805

Saturday Nite Special at Funky Junk Interiors

Sew Darn Crafty Sunday at http://sewmanyways.blogspot.com/

Sunday Showcase Party at Under the Table and Dreaming

Paula and Patti at Ivy and Elephants for What's It Wednesday
 
XO, Pinky
Related Posts Plugin for WordPress, Blogger...